Recycle Project: Tin Can Lanterns
Here's a great and fun idea to do with recycling in mind. I found this idea while doing an Internet search for tin can lanterns. There are several tutorials on Internet but I liked this one from the Grow Creative blog and thought I would share it with you. Here's the address: http://growcreative.blogspot.com/2012/07/tin-can-lanterns-tutorial.html. Here's the tutorial:
Tin Can Lanterns Tutorial
I love summer and I
love that I finally have a backyard to have parties in! I made these tin can
lanterns for a 4th of July party and they looked so lovely that I thought I
would write a tutorial to share with you all.
So follow the
tutorial below to get started making your own lanterns for your own outdoor
summer party!
recycled tin cans
hammer
nail
bailing wire
pliers
spray paint
tea light candle
Step 1: Remove labels and glue from the cans. I've found WD-40 to be very helpful with removing the glue.
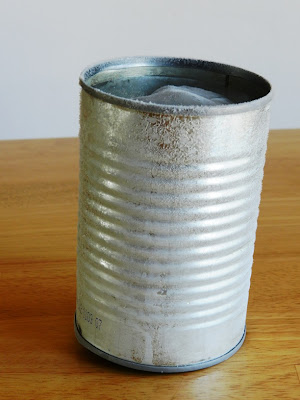
Step 2: Fill cans with water and stick them in the freezer. Leave them in until the ice is solid. This helps the can hold its shape for the next steps.
Step 3: Take your frozen can out of the freezer. Using a hammer and nail, pound a hole near the top of the can. Flip the can over and make another hole straight across from the first hole. These will be used for the handle later on.
Step 4: Make your design. Use the hammer
and nail to start punching out a design in your can. You can draw it our before
hand or wing it. Either way, they turn out nicely.
Step 5: Once your design is all
finished, let the ice melt out of the can and dry it out.
Step 6: Upon turning the can over, you'll notice a big bulge in the bottom. This comes from freezing water in it. But, it can be fixed! Just pound it down with a hammer so that it sits flat.
Step 7: Time to make a handle. Cut a 12
inch strip of bailing wire and curve the end of it to form a hook. Stick the
hook through one of the top side holes.
Step 8: Twist the hook around to secure it. Make a hook on the other end of the wire. Stick it in the side hole on the other side and twist it around. There's your handle!
Step 9: Time for some spray paint! Paint
several coats on to cover the entire can and handle. I used Krylon Indoor/
Outdoor paint and it worked great.
Step 10: Once the paint is dry, insert tea light candles and light them up! You're all ready to go!
Reader Tips:
- Azirkah said...To keep the bottom of the can from bulging out, put 2 or 3 inches of water in the can and let that freeze, then top off the can and freeze again.
- Esther en Calou said...... avoid to make holes in the bottom inch of the can. When your candle melts and the holes are made too close to the bottom, the wax will pour out.
- E C Ballard ஃ said...If you have a dremel tool or any kind of flexible shaft, you can use a burr or a very small metal drillbit and you will not need the ice.
- Nicole said...fill your can with sand prior to adding the water and placing in the freezer! It will prevent your can from bulging during the water expansion process :0)


No comments:
Post a Comment